This is an old revision of the document!
Table of Contents
SMTP export

Toolbar
No
Status bar
No
Actions
Note: Specific knowledge of SMTP server settings and building the HTML or plain-text email template is required to use this export method successfully.
This page only gives you the explanation of how the various settings work and a basic example for the HTML email and plain-text template.
We do not provide support on finding the correct server settings and/or designing email templates and their display/operation in the final email application.
Using this export method, you can send mass emails directly from Database Application Pro using the SMTP protocol. Database Application Pro will communicate directly with the specified SMTP server.
Sending e-mails
via the Send e-mails… emails are sent to the specified entities. This button is only available when you have entered sufficient information.
After sending, you will always see a result window displaying any errors.
If everything went successfully, the window looks like this.

If an error occurs, this will also be displayed and the general result will be Failed will be. To know exactly what goes wrong, it is sometimes possible to see the internal error, this will give you more information about what goes wrong between Database Application Pro and the SMTP server. By clicking on the View error you will get a window with the actual internal error message.
In the example below, you can see that the SMTP server indicates that authentication failed, which is correct because in this case the password was entered incorrectly.

Test e-mail
Via the Test e-mail… there is the possibility to do a test send of the first e-mail to a manually specified e-mail address. This allows you to send this e-mail to yourself and check whether the e-mail is constructed and displayed properly. This button is only available when you have entered sufficient information.

Tabs
Settings
Actions
In this tab, you specify the settings to send emails via SMTP. After sending the e-mails, the settings, excluding the SMTP password, are permanently saved. This avoids you having to enter all SMTP settings every time, only the password will have to be entered every time.
Email content
Subject
This text is used as the subject of the email, you will therefore also see this text in the final email application as the subject of the sent email. There are no placeholders possible in this text.
The example below is how the subject is displayed in Microsoft Outlook 2013.

HTML email text & Plain text email text
Here you select the template file used for SMTP e-mail sending, you must choose at least one of the two types. If you select both an HTML and a plain text template, both will be sent with the actual e-mail transmission. It is then up to the final e-mail client which of the two is displayed, normally an HTML e-mail text will always be preferred, only when an e-mail client does not support HTML will the plain text e-mail be displayed.
Address of
Display name
The display name associated with the e-mail address with which the e-mail will eventually be sent. This name is usually displayed in the e-mail client application as the sender of the e-mail. No placeholders are possible in this text
E-mail address
The e-mail address that is displayed and the e-mail client.
The example below is how the display name and e-mail address is displayed in Microsoft Outlook 2013.

Address to
Display name
The entity field that contains the display name associated with the e-mail address to which the e-mail is ultimately sent.
Email address
The entity field which contains the actual e-mail address to which the e-mail is sent.
Type
Here you specify how the recipient's e-mail address is used in the e-mail. This can be the To, CC or BCC field. Because a separate e-mail is created for each entity, e-mail addresses of other entities will never be sent along in the To, CC or BCC field.
The example below shows that when e-mails with type BCC are sent there are no To address is displayed in Microsoft Outlook 2013.

SMTP server settings
In this group, you specify the server settings to connect to the SMTP server.
You can usually request this data from your internet service provider or hosting party.
Server address
The address of the SMTP server used to send e-mails.
This can also be a direct IP address.
Server port
The port by which the SMTP server is to be reached.
This is usually port 25 for unsecured connections (SSL off) or port 465 or 587 for secured connections (SSL on).
Use SSL
Indicates whether you want to use a secure connection (SSL on) or not (SSL off).
Username
The user name with which you authenticate to the SMTP server.
Password
The password with which you authenticate to the SMTP server. The password is not stored.
Available fields
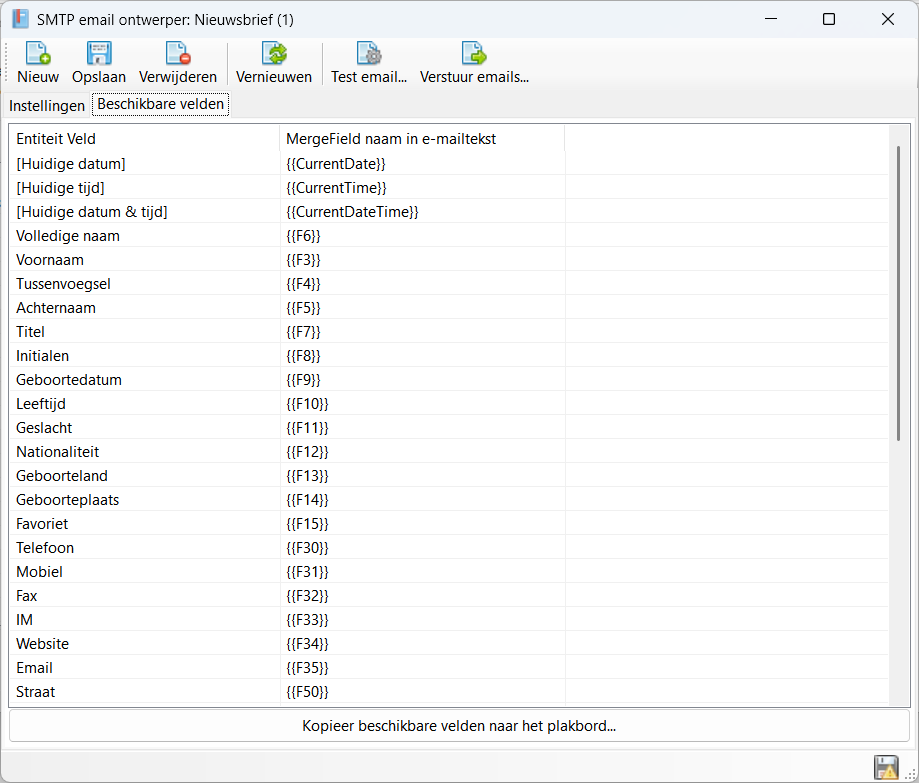
Actions
This tab gives you the different variables to use in the e-mail template. Each field {{:fxx}} will be replaced with the entity's actual value when generating the e-mail.
Examples
Plain text email
A plain-text email is relatively simple, using a .TXT file, a text with variables is constructed. This can be done, for example, with Notepad which comes standard in Windows.
The image below shows an example e-mail template, in this example field 27 (%%.TXT Next, select this
 file as Plain text e-mail text and enter the rest of the data.
email-inlined.html After sending, the email will look like this in Outlook 2013.
 ==== HTML email ====
Building an HTML email is relatively difficult to do and requires specific knowledge of HTML, CSS and how email clients work.
To show the principle, this example uses a simple free-to-use template.
The template can be found here htmlemail.io, and then the
==== HTML email ====
Building an HTML email is relatively difficult to do and requires specific knowledge of HTML, CSS and how email clients work.
To show the principle, this example uses a simple free-to-use template.
The template can be found here htmlemail.io, and then the example.
Download this file and save it to your computer, then open the file in an editor so you can enter the variable.
In the example below, on line 117 the field 27 is placed as a variable, this field contains the full name of the entity.
.HTML Next, select this
 file as HTML e-mail text'' and enter the rest of the data.

After sending, the email will look like this in Outlook 2013.

Hotkeys
Window wide
The following hotkeys are valid across the entire window, they do not depend on the focus on a particular component
| Hotkey | Action |
|---|---|
| F1 | Call up online documentation |
| Alt + F4 | Close window |
Component-specific
No


